Sketchbook: Visual Journal Making is a course I teach at Chicago’s Palette and Chisel Academy. The course invites students to explore ways to take visual notes. We explore how to create quick, effective sketches for their own sake, or as preparatory work for other projects. We work on mark-making, both free and gestural and precisely detailed.
In the summer and fall, my class meets outdoors at different Chicago locations. As a colleague from England told me, “the residents of no other city that I know celebrate summer like Chicagoans.” After freezing through winter, my students are eager to explore city’s long stretches of waterfront, parks, landmark buildings, and lush gardens, including Millennium Park, Chicago Cultural Center, and Garfield Park Conservatory.
Essential Design Concepts
A good way to begin sketching is to study shapes and see how light renders them. Look for contrasts: juxtaposed geometric shapes of buildings, walkways, fountains against organic trees and people.
A view finder can be useful to frame a scene, from which one can make thumbnail sketches. First indicate contours, then add shading to indicate dark and light shapes. I recommend three to five values. In setting up the composition, consider grouping shapes together, in an asymmetric design, and setting a focal point apart from the larger supporting shapes. Look for way to incorporate repetition, to strengthen the theme.
Consider also adding people or other recognizable objects to indicate scale. Check the perspective—make sure the eye level is correct and depth lines (orthogonals) recede back to either one or two-point perspective as observed.
Using Color
It is not necessary to paint an entire sketchbook page. Think of the sketching as making color notes. The sketchbooks of British textile designer William Morris, and preparatory sketches by Christo & Jeanne-Claude, offer excellent examples
When using water media, I recommend that, after the contour lines are placed, areas are filled with color using Stabilo pencils. This water-soluble pencil brand can be brushed with a damp mop brush to produce colorful washes. Once dry, I further work in details with a small brush using watercolors and white gouache.
Materials
I recommend limiting the art supplies to only those absolute necessary and easy to transport. Planning what you want achieve prior to each session helps in selecting materials, as well as achieving the goals you set for your outing.
Here are materials I suggest:
1. All-media sketchbook such as Moleskin watercolor album or Bristol pad
2. View Catcher https://www.amazon.com/Color-Wheel-Artists-View-Catcher/dp/B001DKMZNG
3. Graphite pencils, sharpener, eraser
4. Stabilo Marking Pencils (all-surface, available in black, blue, brown, green, orange, red, white) or other watercolor pencils
5. Brush with water reservoir or watercolor brushes. Examples: Niji waterbrush
6. Small container for water
7. Watercolor brushes flats (1⁄4", 1⁄2", 3⁄4") and round (#3 and #1) in nylon or sable
8. Folding plastic watercolor palette, 8"x 8" opened (Blick) or other brand
9. Watercolor tubes or cakes: Indian yellow, yellow ochre, alizarin crimson,
olive green, oxide of chromium, permanent magenta, ultramarine blue, ivory black
10. Designers Gouache tubes: Titanium white
11. Tripod Folding Stool (Amazon) or folding easel is optional.
Sketchbook Making
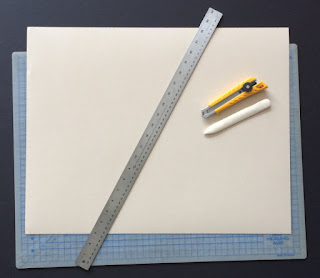
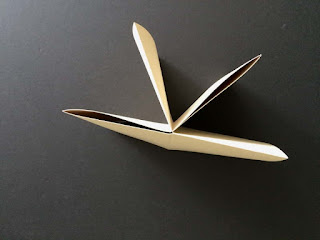
I also construct sketchbooks, pairing them in different themes. There are two techniques I use: a folding method, made from a single sheet—without using glue or staples, and a wire-bound method.
The folding method offers freedom to experiment with wide range of papers. I normally use Annigoni all-media paper made by Cartieri Magnani (beige) available at Legion paper. https://legionpaper.com/annigoni/
For the wire-bound books method, I cut paper sheets to same size and sketch and save them in a portfolio. Depending on the theme or subject, I collect a group and bind them at a local copy store.
Master Sketchbook Artists
Albrecht Dürer
Rembrandt
Raphel
Giovanna Garoni
William Turner
William Morris
Winslow Homer
Andrew Wyeth
Edward Hopper
David Hockney
Ellsworth Kelly
Christo & Jeanne-Claude
Upcoming Classes
I offer a five-session Sketchbook class at Millennium Park in the fall 2017. Please visit Palette and Chisel Academy website for more details
https://reg126.imperisoft.com/PaletteAndChisel/Search/Registration.aspx
Hope to see you there!
—Helen
 |
| The sketchbook can be viewed as a book or as a single open sheet. The open version produces abstract narrative. |
 |
| Sketching supplies |
 |
| Various sketchbooks |
 |
| Constructing folding sketchbook, step 1 |
 |
| Constructing folding sketchbook, step 2 |
 |
| Constructing folding sketchbook, step 3 |
 |
| Constructing folding sketchbook, step 4 |
 |
| Constructing folding sketchbook, step 5 |
 |
| Constructing folding sketchbook, step 6 |
 |
| Constructing folding sketchbook, step 7 |
 |
| Constructing folding sketchbook, result |
 |
| Demo: Garfield Park Conservatory |
 |
| Demo: 2-point perspective |
 |
| Demo: 1-point perspective |
 |
| Demo: Boeing Gallery, Millenium Park |
 |
| Demo: Jay Pritzker Pavilion, Millenium Park |
 |
| Demo: Cloud Gate, Millenium Park |
 |
| Demo: Chicago Cultural Center |
 |
| Demo: Botanical 1 |
 |
| Demo: Botanical 2 |
 |
| Demo: Opaque watercolor |
 |
| Sketch by student Barbara Humbert |
 |
| Sketch by student Sondra Pfeffer |
 |
| Sketch by student Marcy Calkins |


